|
Online Help : How to annotate TIFF files (click
here).
Annotation (Objects)
Annotations can be added to existing image as attached objects.
They can be re-edited, moved freely to any position on the image,
or be deleted.
Annotation can only be used in TIFF image format.
Use the Annotation menu
items.

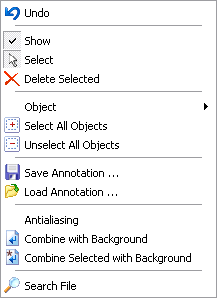  
Annotations can be saved as a separate annotation layers,
separate annotation file (*.ant) or they can be saved as a
permanent part of an image (after Combine with Background).
To save annotations as a
separate layer (stored in the TIFF tags)
Under the File Menu
select the Save menu
item.
To save annotations as a
separate file (*.ant)
Under the Annotation
Menu select the Save
Annotations menu item.
To load annotayion from a separate annotation file (*.ant)
Under the Annotation
Menu select the Load
Annotations menu item.
To save annotations as a
permanent part of an image
Under the Annotation
Menu select the Combine with
Background menu item.
PLEASE NOTE, once the annotation objects are combined with
background, they become part of the background layer and can no
longer be edited as individual objects.
Antialiasing parameter
controls the anti-alias filter.
NOTE.
Some annotations (Ellipse, Angle,
Ruler and LineLabel) cannot be kept in a file as objects.
To not lose it, you should combine
it with a background right after inserting and editing.
Use 'Combine selected objects with
background' command.
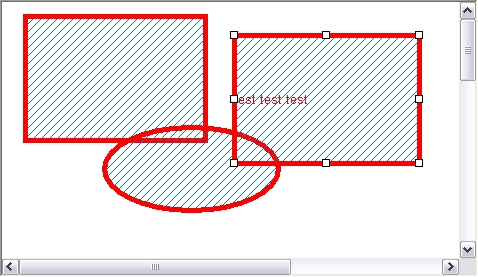
Annotation allows users
to add notes, lines, highlight, etc. to images, whether they were
received as faxes, acquired through a scanner or digital camera, or
some other method.


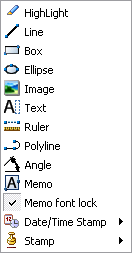
To edit or create annotation objects, the following items are
available in the annotation tool bar box.
They can also be selecetd through the [Annotation] menu bar.
Buttons: Allows the user
to click and drag to create an objects.
 SELECT: Allow to select an object to move or edit
(resizing an object pressing ALT key the object will maintain the
aspect ratio) SELECT: Allow to select an object to move or edit
(resizing an object pressing ALT key the object will maintain the
aspect ratio)
 HIGHLIGHT: highlight object HIGHLIGHT: highlight object
 LINE: line object. LINE: line object.
 BOX: box object (pressing CTRL draws a square) BOX: box object (pressing CTRL draws a square)
 ELLIPSE: ellipse object ELLIPSE: ellipse object
 IMAGE: image object (You have to make a single click to
put the object, otherwise it changes its size). IMAGE: image object (You have to make a single click to
put the object, otherwise it changes its size).
 TEXT: text object TEXT: text object
 RULER: ruler object RULER: ruler object
 POLYLINE: poly line (open polygon), also good for free
hand painting POLYLINE: poly line (open polygon), also good for free
hand painting
POLYLINE. Click and release the left mouse button to set the
initial control point.
Move the mouse to the next desired location and click and
release the left mouse button again.
When you are finished drawing, double click the left mouse
button.
FREEHAND. Click (and hold) the left mouse button and drag to
draw.
When you are finished drawing, double click the left mouse
button.
 ANGLE: an angle measurement object ANGLE: an angle measurement object
 MEMO : a multiline text object MEMO : a multiline text object
Memo Font Lock: locks
the alignment, color and font, allowing all characters to have the
same visual characteristics (using toolbar and menu buttons).
If the Memo Font Lock
property is disabled the user can modify font and alignment using
the following control keys:
Shift + F2 : increase font size
Shift + F1 : decrease font size
CTRL + L : left align
CTRL + T : center align
CTRL + R : right align
CTRL + J : justified
CTRL + F : open font dialog
CTRL + B: Bold
CTRL + I : Italic
CTRL + U : Underline
CTRL + G : set background color (open dialog)
You can change these shortcuts by using
File | Users settings | Hotkeys
and select Annotation->Memo edit
 DATE/TIME: text object with the date
and/or time DATE/TIME: text object with the date
and/or time
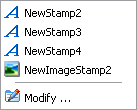
 STAMP (TEXT or IMAGE): Click this to popup a list of
pre-defined text or image stamps, and choose the stamp to use. STAMP (TEXT or IMAGE): Click this to popup a list of
pre-defined text or image stamps, and choose the stamp to use.
Annotation Properties
Each annotation type has their own property.
Item
Property
HIGHLIGHT Brush color
LINE Pen
color, Pen style, Pen width
BOX Pen
color, Pen style, Pen width, Brush color, Brush style
ELLIPSE Pen color, Pen style, Pen
width, Brush color, Brush style
IMAGE
None
TEXT Pen
color, Pen style, Pen width, Brush color, Brush style, Font style,
Font size
RULER Pen
color, Pen width, Font style, Font size
POLYLINE Pen color, Pen style, Pen
width
ANGLE Pen
color, Pen style, Pen width, Font style, Font size
MEMO Pen
color, Pen style, Pen width, Brush color, Brush style, Font style,
Font size
DATE/TIME Pen color, Pen style, Pen
width, Brush color, Brush style, Font style, Font size
TEXT STAMP Pen color, Pen style, Pen
width, Brush color, Brush style, Font style, Font size
Pen Color and
Brush Color allows the user
to specify the color to be used for annotation objects.
Font option allows the
user to specify the font, font style, script, size, color and
effects for text placed into note annotation objects.
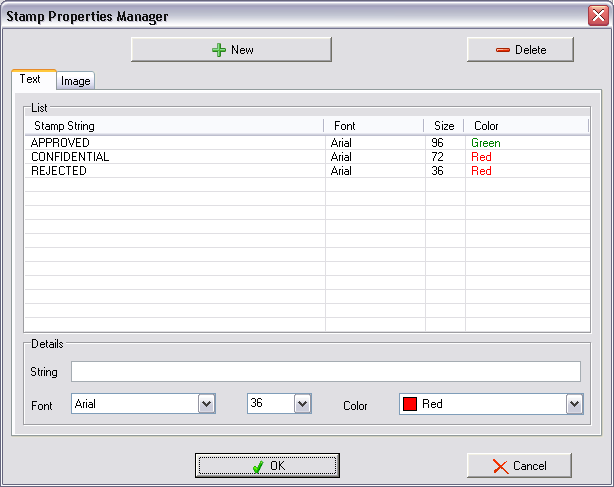
STAMP: Allows the user to use a predefined rubber stamp to
annotate with. The list of rubber stamps can be modified.
Text Stamp
Image
Stamp
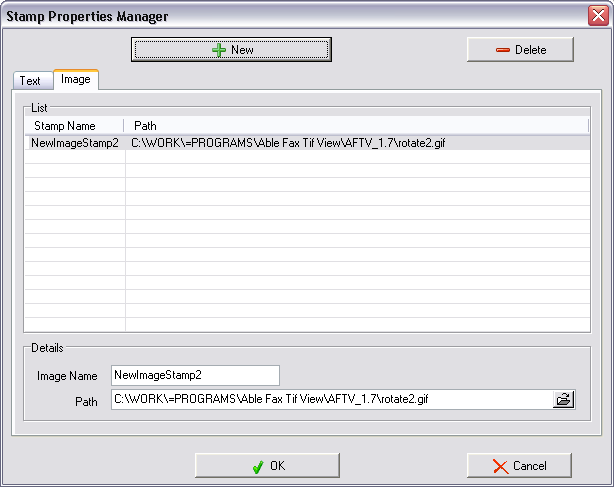
You can click on the page to insert image
stamp with original size and aspect ratio or
select the rectangle region with custom
size.
See Annotation Settings.
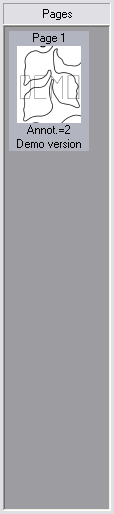
The program shows amount of the annotations
on each page.
Use the arrow keys ["Ctrl" + arrow key] to move selected
annotations.
Use the arrow keys ["Shift" + arrow key] to resize selected
annotations.
Import annotations from XML
file ...
See more information ... http://www.tiffedit.com/blog/archives/59
Export annotations to XML file
...
See more information ... http://www.tiffedit.com/blog/archives/53
|

